That tired old tabletop staring back at you doesn't have to be an eyesore any longer! Breathe new life into your furniture with a simple, affordable, and satisfying DIY project. It's amazing what a little creativity and elbow grease can do.
Let's face it, we've all been there. You've got a perfectly functional table, but the surface is scratched, stained, or just plain outdated. Replacing the whole thing seems wasteful and expensive, but living with the current state of affairs just isn't inspiring. You want a change, a refresh, something that reflects your personal style without breaking the bank or requiring advanced woodworking skills.
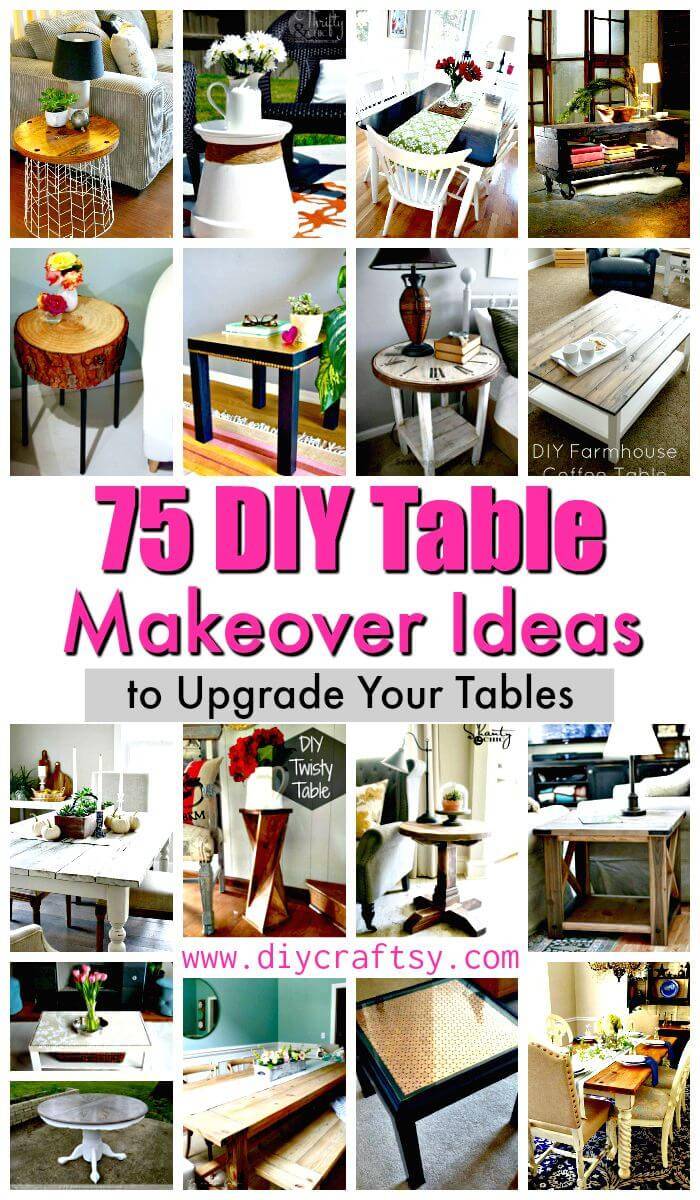
This post is for anyone who's looking to revamp their existing tabletops without spending a fortune or hiring a professional. Whether you're a seasoned DIY enthusiast or a complete beginner, you'll find inspiration and practical tips to transform your tables into stunning centerpieces.
Ready to roll up your sleeves and get creative? This guide explores a variety of tabletop makeover ideas, from simple painting techniques to more elaborate resurfacing projects. We'll cover everything from preparing your surface to choosing the right materials, ensuring a smooth and successful transformation. Get ready to discover how to breathe new life into your old furniture and create a space that reflects your unique style.
Easy Painting Techniques for Tabletop Transformation
The target of this section is to explore the world of painting as a simple and effective method for tabletop makeovers. It aims to guide readers through various painting techniques suitable for different styles and surfaces, emphasizing ease of application and stunning results. It also aims to share about my personal experience, and then goes deeper into the explanation about DIY Tabletop Makeover Ideas and related keywords.
I remember my first attempt at a tabletop makeover. It was an old coffee table I'd inherited, the surface marred with water rings and fading varnish. I was intimidated, thinking I needed fancy tools and professional expertise. But after some research, I decided to try a simple chalk paint technique. The beauty of chalk paint is its forgiving nature – minimal prep work is required, and it adheres to almost any surface. I chose a soft, muted blue, applied two coats, and then lightly distressed the edges for a vintage look. The result was incredible! That old, unloved coffee table became the focal point of my living room, a testament to the power of a simple paint job.
Painting is arguably the easiest and most budget-friendly way to transform a tabletop. The possibilities are endless, from solid colors to intricate patterns and designs. Before you start, consider the overall aesthetic of your space and choose a color palette that complements your existing decor. For a modern look, opt for bold, saturated hues or geometric patterns. For a more rustic or farmhouse feel, consider using chalk paint or milk paint and distressing the surface to reveal the underlying wood grain. Stencils can also be used to create intricate designs or add a personal touch. Remember to properly prepare the surface by cleaning and sanding it lightly to ensure proper adhesion of the paint. And don't forget to seal the finished product with a clear coat to protect it from scratches and spills. With a little creativity and patience, you can achieve professional-looking results without breaking the bank.
Resurfacing with Epoxy Resin: A Modern Marvel
Resurfacing with epoxy resin is a game-changer in the world of DIY tabletop makeovers. It involves applying a clear or tinted epoxy resin over the existing tabletop to create a smooth, glossy, and durable surface. This technique is particularly popular for creating river tables (where resin mimics a river flowing through wood) or for embedding decorative elements like stones, shells, or even artwork within the resin. The result is a stunning, one-of-a-kind piece that's sure to impress. Before you embark on an epoxy resin project, it's crucial to understand the process and take the necessary precautions. Epoxy resin requires careful mixing and pouring to avoid bubbles and imperfections. It also takes time to cure properly, so patience is key. However, the end result is well worth the effort. An epoxy resin tabletop is not only beautiful but also highly resistant to scratches, stains, and heat, making it a practical and stylish choice for any home.
The History and Myth of Tabletop Transformations
Tabletop transformations have been around for centuries, evolving from simple repairs to elaborate decorative arts. In ancient times, tabletops were often adorned with mosaics, inlays of precious stones, or intricate carvings. During the Renaissance, painted tabletops became popular, often depicting scenes from mythology or classical literature. The Victorian era saw the rise of ornate embellishments, with tabletops adorned with decoupage, lacquer, and gilding. Today, DIY tabletop makeovers are more accessible than ever, thanks to the availability of affordable materials and online tutorials. While there are no specific myths associated with tabletop transformations, the act of repurposing and revitalizing old furniture can be seen as a symbolic act of renewal and transformation, breathing new life into discarded objects and giving them a new purpose.
Unlocking the Hidden Secrets of Tabletop Finishes
The secret to a successful tabletop makeover lies in the finish. The right finish not only enhances the beauty of the surface but also protects it from wear and tear. There are a variety of finishes to choose from, each with its own unique properties and characteristics. Polyurethane is a popular choice for its durability and resistance to scratches and stains. Varnish provides a classic, glossy finish that's ideal for traditional styles. Lacquer offers a high-gloss, professional-looking finish but requires specialized equipment and techniques. Oil-based finishes penetrate the wood, providing a natural, matte look that's easy to maintain. And wax finishes offer a soft, subtle sheen that's perfect for adding a touch of elegance. When choosing a finish, consider the type of wood, the desired aesthetic, and the level of protection you need. Experiment with different finishes on scrap wood to find the perfect one for your project.
Recommended Materials for Your Tabletop Project
The materials you choose will greatly impact the final look and durability of your transformed tabletop. For painting projects, opt for high-quality paints and primers that are specifically designed for furniture. Chalk paint and milk paint are excellent choices for creating a vintage or rustic look. For resurfacing projects, epoxy resin is a must, along with any decorative elements you wish to embed within the resin. For adding texture, consider using wood filler to create raised patterns or stencils to apply intricate designs. Don't forget to invest in the right tools, such as sandpaper, brushes, rollers, and mixing containers. And always prioritize safety by wearing gloves, masks, and eye protection when working with potentially hazardous materials.
Exploring the World of Decoupage
Decoupage is a fascinating technique that involves adhering paper cutouts to a surface and then sealing them with multiple coats of varnish. It's a fantastic way to personalize your tabletop and create a unique, eye-catching design. You can use anything from vintage maps and newspaper clippings to fabric scraps and dried flowers. The key to successful decoupage is to use a good quality adhesive and to apply multiple thin coats of varnish, sanding lightly between each coat to create a smooth, seamless finish. Decoupage is a time-consuming process, but the results are well worth the effort. A decoupage tabletop is not only beautiful but also a conversation starter, showcasing your creativity and personal style.
Tips for Achieving a Flawless Finish
Achieving a flawless finish on your tabletop makeover requires patience, attention to detail, and a few insider tips. First and foremost, proper preparation is key. Clean the surface thoroughly, sand it smooth, and prime it properly before applying any paint or finish. Use high-quality brushes and rollers to avoid streaks and uneven coverage. Apply multiple thin coats rather than one thick coat to prevent drips and runs. Sand lightly between each coat to create a smooth, even surface. And always allow the paint or finish to dry completely before applying the next coat or using the table. With a little patience and practice, you can achieve a professional-looking finish that will last for years to come.
Mastering the Art of Distressing
Distressing is a technique used to create a worn, vintage look by intentionally removing some of the paint or finish. It's a popular choice for creating a rustic or farmhouse aesthetic. There are several ways to distress a tabletop, including using sandpaper, a scraper, or even a damp cloth. The key is to focus on areas that would naturally wear over time, such as edges, corners, and raised details. Experiment with different techniques and tools to find the ones that work best for you. And don't be afraid to get creative – there are no hard and fast rules when it comes to distressing. The goal is to create a unique, personalized look that reflects your individual style.
Fun Facts About Upcycled Furniture
Did you know that upcycled furniture is not only stylish but also environmentally friendly? By repurposing old furniture, you're reducing waste and conserving resources. Upcycling has become increasingly popular in recent years, as more and more people are looking for ways to live more sustainably. Some upcycled furniture pieces have even become valuable collectibles, fetching high prices at auctions and antique stores. And the best part is that upcycling is a creative and rewarding process that allows you to express your individuality and create unique pieces that reflect your personal style.
Step-by-Step Guide to a Faux Marble Tabletop
Creating a faux marble tabletop is a surprisingly simple and affordable way to add a touch of elegance to your space. The first step is to paint the tabletop with a base coat of white paint. Once the base coat is dry, use a feather or a sponge to apply veins of gray and gold paint, mimicking the natural patterns of marble. Experiment with different techniques and colors to create a unique and realistic marble effect. Once the paint is dry, seal the surface with multiple coats of clear polyurethane to protect it from scratches and spills. The result is a stunning faux marble tabletop that looks just as luxurious as the real thing.
What If I Mess Up My Tabletop Makeover?
Don't panic! Mistakes happen, and the beauty of DIY is that you can always fix them. If you accidentally drip paint, sand too much, or create an uneven finish, don't despair. Sand down the affected area, reapply the paint or finish, and try again. With a little patience and persistence, you can overcome any challenges and achieve the results you're looking for. And remember, even mistakes can sometimes lead to unexpected and beautiful outcomes. Embrace the imperfections and learn from your experiences. After all, the most rewarding DIY projects are often the ones that involve a little trial and error.
Top 5 Tabletop Makeover Ideas for Small Spaces
Here's a listicle for those with limited space.
1.Chalkboard Tabletop: Perfect for kitchens or kids' rooms, a chalkboard tabletop provides a surface for writing notes, drawing, or playing games.
2.Mirror Tabletop: A mirrored tabletop adds a touch of glamour and reflects light, making a small space appear larger.
3.Tiled Tabletop: Tiles are durable, easy to clean, and come in a variety of colors and patterns, making them a great choice for coffee tables or side tables.
4.Fabric Tabletop: Cover a tabletop with your favorite fabric for a cozy and personalized look.
5.Map Tabletop: Use a vintage map to create a unique and travel-inspired tabletop.
Question and Answer
Q: What is the best way to prepare a tabletop for painting?
A: Clean the surface thoroughly with soap and water, sand it smooth with sandpaper, and apply a coat of primer before painting.
Q: What type of paint is best for tabletops?
A: Chalk paint, milk paint, and acrylic paint are all good choices for tabletops. Choose a paint that is durable and easy to clean.
Q: How can I protect my transformed tabletop from scratches and spills?
A: Apply multiple coats of clear polyurethane or varnish to seal the surface and protect it from wear and tear.
Q: What are some creative ways to decorate a tabletop?
A: Consider using stencils, decoupage, or epoxy resin to add a personal touch to your tabletop.
Conclusion of DIY Tabletop Makeover Ideas
Transforming a tired tabletop is a rewarding and budget-friendly way to refresh your home decor. From simple painting techniques to elaborate resurfacing projects, there's a tabletop makeover idea to suit every style and skill level. By following these tips and techniques, you can breathe new life into your old furniture and create a space that reflects your unique personality. So, gather your materials, unleash your creativity, and get ready to transform your tabletops into stunning centerpieces.